Pages

Showing posts with label Home. Show all posts

Saturday, September 17, 2011

DIY Art: Twine on Painted Canvas

Hey All!  I hope your weekend is good so far.  To update you on the front door, I have two coats on it so far, but I need to do at least some touch up after it dries before the big reveal.  My front door has 9 window panes (To tape off the windows on both sides of the door, I had to use 72 pieces of tape!), and I want to hang a small curtain in this windowed area for privacy.  The glass is not frosted or anything so people can basically see straight in otherwise.  So, I am not sure if I will post photos tomorrow or I will wait till next weekend, when I hope to have my mama's help sewing a curtain to hang there.

That being said, I did work on another really easy DIY project today: Twine on Painted Canvas.  I didn't really see this anywhere, but I was inspired by several ideas of people using wooden letters or stencils on canvas to have a very simple but pretty piece of wall art.  I have needed a small piece of art for my powder bathroom for some time now, and I decided to use this idea in that bathroom.  The basic idea: paint a canvas a solid color and use glue to create a design with twine on top of the background color.  I will tell you what I did, and then I will tell you what I liked and didn't like about it.

Step 1: Get your supplies together.
You will need a canvas, two colors of paint (a solid of your choice and a tan or gold to coordinate with the twine), paintbrushes, twine, scissors, hot glue gun, and hot glue sticks.

Step 2: Paint your canvas with your paint of choice I used a light blue acrylic paint that coordinated with accents in my powder bath.  I needed two coats for good coverage.
Step 3: Choose a design for your twine.  I was inspired by this image.
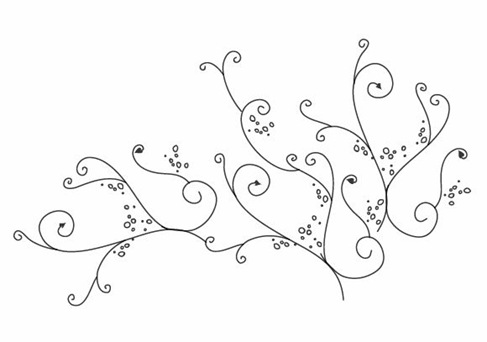

Step 4: (I did not do this and regret it.)  After letting your paint dry, VERY LIGHTLY trace your design in pencil onto your canvas.
Step 5: Let your hot glue gun heat up as you cut your first few pieces of twine.  I cut my twine as I went because I was only loosely following the design from the image above.  


Step 6: Trace over your pencil with the hot glue gun, affixing small lengths of the twine at a time.


Step 7: After gluing down all of my twine, I took a moment to trim up any wild strings from the twine and from the hot glue to "clean it up" a bit.
Step 8: Paint the edges of the canvas with a gold or tan to coordinate with the twine (I used gold.)
You have an easy to do piece of art!


Okay, so, I have to say there were some pro's and con's to this project.

Pros: Quick, easy, uses products most crafters already have at home
Cons: Can take patience and care to get a "clean" look

To have a nice clean look (cleaner than mine), I recommend tracing your design on the canvas first.  I also recommend being especially careful to use as little glue as possible as your trace your lines.  Do not use big globs.  You don't want to see the shiny glue after it is completed.  I had like three places I had to pull off and review.  It was kind of a pain to have to do this, but it could have been avoided if I had realized how important it was earlier to not get "globs."

If you modify this idea or have another idea like it, let me know!  I liked this project, but I think it could have turned out better if I had done a few of the recommendations I gave here.


Friday, September 16, 2011

My Household Binder: The Basics

I first heard about a "household binder" about six months ago while reading this blog.  I decided to make one using an old binder and dividers I had sitting in a closet.  I mostly just used A Virtuous Woman's printables at the time.  After seeing this first household notebook, I felt like I saw them everywhere!  It was really handy for me, but I started wanting to "cutesy" mine up a bit and add some elements I hadn't originally included after reading ideas from other bloggers.  So, my household binder has been a sort of work-in-progress.  It has evolved, and most recently, I created several of my own printables that fit my personal taste a little better.  I still would recommend the printables from A Virtuous Woman.  I simply found that eventually I wanted to invest the time to do something a little different.

The basic idea of a household notebook, if you haven't heard of this before, is simply a place to keep the key information and lists you need for your home.  My notebook includes 5 sections: Schedules and To-Do Lists, Budget, Cleaning, Meals, and Important Information.  I put lots of handy information in one place including to-do lists, insurance info, a bill checklist, meal plans, grocery lists, etc.  I am going to break up showing you my binder into a few posts because there is a lot to share.  First, I will just show you what my binder and dividers look like.  We can dig deeper later.

The Front of my Binder, made using Microsoft Word


Labels
The Inside Cover of my Binder, made using Microsoft Word

If you would like to customize these covers, I can send you them as a customizable Word document; however, you will need to download the font to use it.  The font is called Black boys on mopeds.  Yeah, you can't make something like that up, can you?  To download the font, click here.

I'll post more photos from inside my binder soon, but if you want to know more, check out these household binders that I have used for inspiration:

Have a good weekend!


Wednesday, September 14, 2011

Mission Organization

It's Wednesday, and I am halfway through the week (I refuse to refer to Wednesday as "hump day" because I find it about as hard not to giggle as it would be for a 12 year old boy in my class... too late, I am already laughing a little just thinking about it, oh well.)  I really love Wednesdays lately because I have been going to a Wednesday night Bible study, and my mother-in-law (who I love unlike the stereotype) and one of my best friends are in it.  That being said, I have been on this kick to finally get my house a bit more organized, and part of me wants to stay home and sort things.  Ya, I am one of "those" people!  I will have to let most of my ideas wait until the weekend, but I did accomplish this so far:


I was inspired by a Martha Stewart photo I posted last weekend.  My closet isn't quite as cute (I tried to cut it out of the pics, but this closet has our A/C units and water heater in it.)  Still, it is very functional, and having an easy to access place for these supplies (in our living room) is going to be SO much nicer than the way I had it before doing this.  I had my hammer and hanging supplies and flashlight all in the guest bedroom closet, far away from wherever I ever need them.  This makes so much more sense!

I must walk away from the computer for the sake of productivity, but I will try to update when the weekend comes.  My big weekend project: Paint the front door!

Saturday, September 10, 2011

Crafty Fun

Oh my!  I went to several garage sales this morning, and I found several really nice larger frames for a buck a piece, a cute basket for in my bedroom (not sure what I am going to put in it yet!), and an outdoor-decor-pale-flower pot thing (I'll show you, it's hard to explain).  Then, I went to buy my supplies for my key holder/sign, and I was off to work (okay, more like off to fun!).

Frame converted into Magnetic White Board

I spray painted this frame white, put a yellow stationary paper in it, and wrote "To-Do" in sharpie on the glass.  I used a hot glue gun to add some magnets and "Voila!"  I like it--especially the way the frame's curves mirror those in my cabinets.  Sorry for the graininess... these photos were taken with my camera phone.


Outdoor-decor-pale-flower-pot thing

I want to spray paint this, put fake plants in it and hang it by my front door... all in time...


The basket for my bedroom
Any ideas on what I should put in this?  I don't know, but I want to put it on top of my dresser (there isn't anything on it right now).

Finally, the Key Holder
So, I did this just exactly as I planned and described yesterday.  I traced the name on in pencil and then filled it in with a sharpie rather than painting.  I am not skilled enough with a paintbrush to stay in those kind of lines!  I used this "Home" sign that I received as a gift several years ago for the inspiration and the color scheme.
Okay, that's all for Saturday.  Hope you have a good weekend.

Friday, September 9, 2011

Foto Friday

So, this weekend, I have many big plans! I plan to craft, organize, and bake. Instead of just telling you about my project plans, I decided to show you my photo inspiration.

Step 1: CRAFT
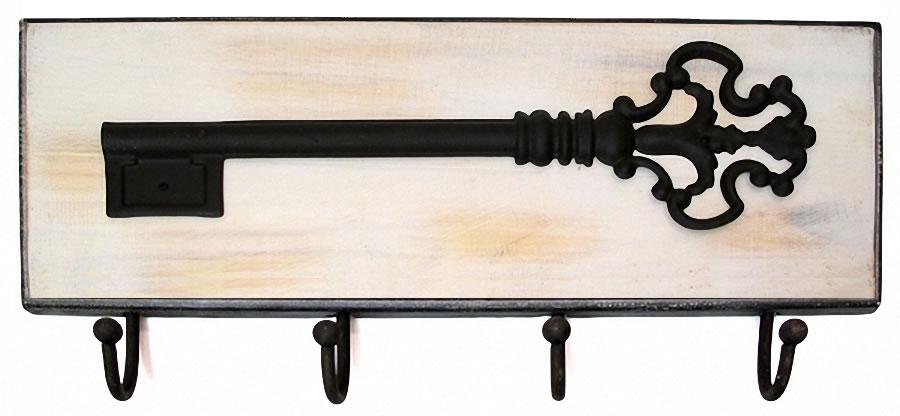
Wooden plaque with hooks

I have REALLY been wanting to get a place to hang my keys near our door. I am going to buy a 16" x 4" routered plaque. First, I am going to paint it a golden yellow. Then, I am going to stencil a cute pattern in metallic gold and paint the routered border black.  Finally, I am going to write our name "Fine" in black script on top of the stenciled background. With the cheap black hooks I found at Lowe's, it should only cost 7 bucks altogether. Sound good? I hope it turns out as fabulous as it looks in my head! If it does, expect photos soon.

Step 2: ORGANIZE

Utility Closet Organization

My utility closet is already pretty organized with hooks for my broom and mop, but I want more. I hate having to look for a hammer, tape measure, flashlight, etc.


Step 3: BAKE

Oatmeal Chip Cookies

Allrecipes.com 5-star rated Oatmeal chip cookies. My good friend L and I are getting together Sunday to bake cookies. We each are bringing a recipe. I'll let you know how mine and L's recipe turn out. Mmmm....